Hi everybody,
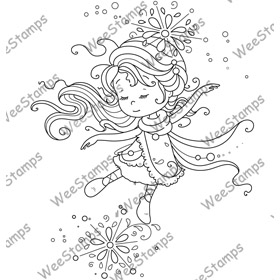
Today I'd like to show you another Christmas card I made. I think this is the second time ever I used my hexagon dies but I wanted to try something new and the pretty Sarah by Wee Stamps (
digi/
rubber stamp) fitted perfectly into the hexagon die.
The base of the card is just kraft cardstock, with stitches by hand around the edges. I smeared a bit embossing ink on one side of an embossing folder and pressed that on two edges of the cardstock, sprinkled white embossing powder on it, tapped it of and embossed that. I wanted to get this not perfect pattern.
Like I mentioned, the image that I used is the newly released Sarah by Wee Stamps (available as a
digital image through Wee Stamps and as a
rubber stamp through Whimsy Stamps). I colored her with Copic Markers and 3D paper pieced her (but what else is new ;) ).
For the embellishments I used gorgeous red Trellis roses, a white open rose, pretty red hip rosebuds and one red Christmas berry spray with pine cones (you'll find links below). I still have berries and a cone left so what you see on this card is about 2/3rd of one spray.
And the little pieces the image was made with :).
I hope you like my new Christmas card. Not that much time until the Christmas cards need to be send of so hope you get some time to do some crafting of your own! Sylvia was kind enough to let me give away Sarah as a digital image to one of the people commenting on this post again! All you need to do is leave a comment and mention that you would like a chance to win Sarah (or that you have already purchased Sarah and would like to win another digital image from Wee Stamps) and from the people who do so I will pick one winner next Saturday. And to make things even better..... if you leave a comment on my post with this card on Sylvia's blog
HERE then you might just win this adorable Sarah as a rubber stamp! So that's two chances, one for the digital and one for the rubber version of this adorable image! Good luck!!
Copic Markers used:
Skin: E11, E00, E000, E0000 and a little bit of R20 as a blush
Hair: E53, E50, CB and then when that's dry a bit of E42, E40 where there'd be shadow.
Brown in clothes: E55, E53, E50 and a little bit of W3 (just dots), W1 and W00 (to smear the W3 out) over that in places where there are shadows
Brown little bear: E53, E50, E0000 and over that where there are shadows E44 (just a dot here and there), E42 (tiny bit), and then again E50, E0000 to smear that out
White fur: E50 only a bit here and there, let that dry a bit and then go over that with E40 (just dots), W00 and CB. All the colored markers are just touches as I want it to look white and not grey.
White in dress: same as fur but without the E40.
Red: R29, R27, R24, let that dry completely and then add really small amounts of R89 in darkest places and smear out with R27, R24 and 20. I find that with the first layer dry the R89 will blend better with the R20-colors. If you put the R89 on first and then start with the R29 it's harder to get it to blend perfectly. It is very important to let the first layer dry as the red will easily run out.
Greenish/brownish shade in scarf: E87, E84, E81, W0
Golden color present: E84 (just dots), E81, W00, CB, use the colored markers just a bit, mostly to blend. With diamond stickles over it this is my favorite gold.
Pink parts in bear: R22, R20, R0000
Shadow around the image: (will make the white look more white): W3, W1, W00, CB
Hugs,
Materials used:
Image: Sarah by Wee Stamps (
digital image/
rubber stamp)
Paper: Kraft, white and red cardstock, Basic Grey Wassail
Other: stitches by hand, diamond and platinum Stickles, embossing ink and white embossing powder, hexagon dies (straight and with scalloped edge) Spellbinders, Doodlebug embossing folder Snowflakes
From Wild Orchid Crafts:
Mixed Red tone Trellis roses 35mm
Red Christmas Berry Spray with pine cones MKX-326
White Open Roses 25mm
Mixed Red tone Hip Rosebuds