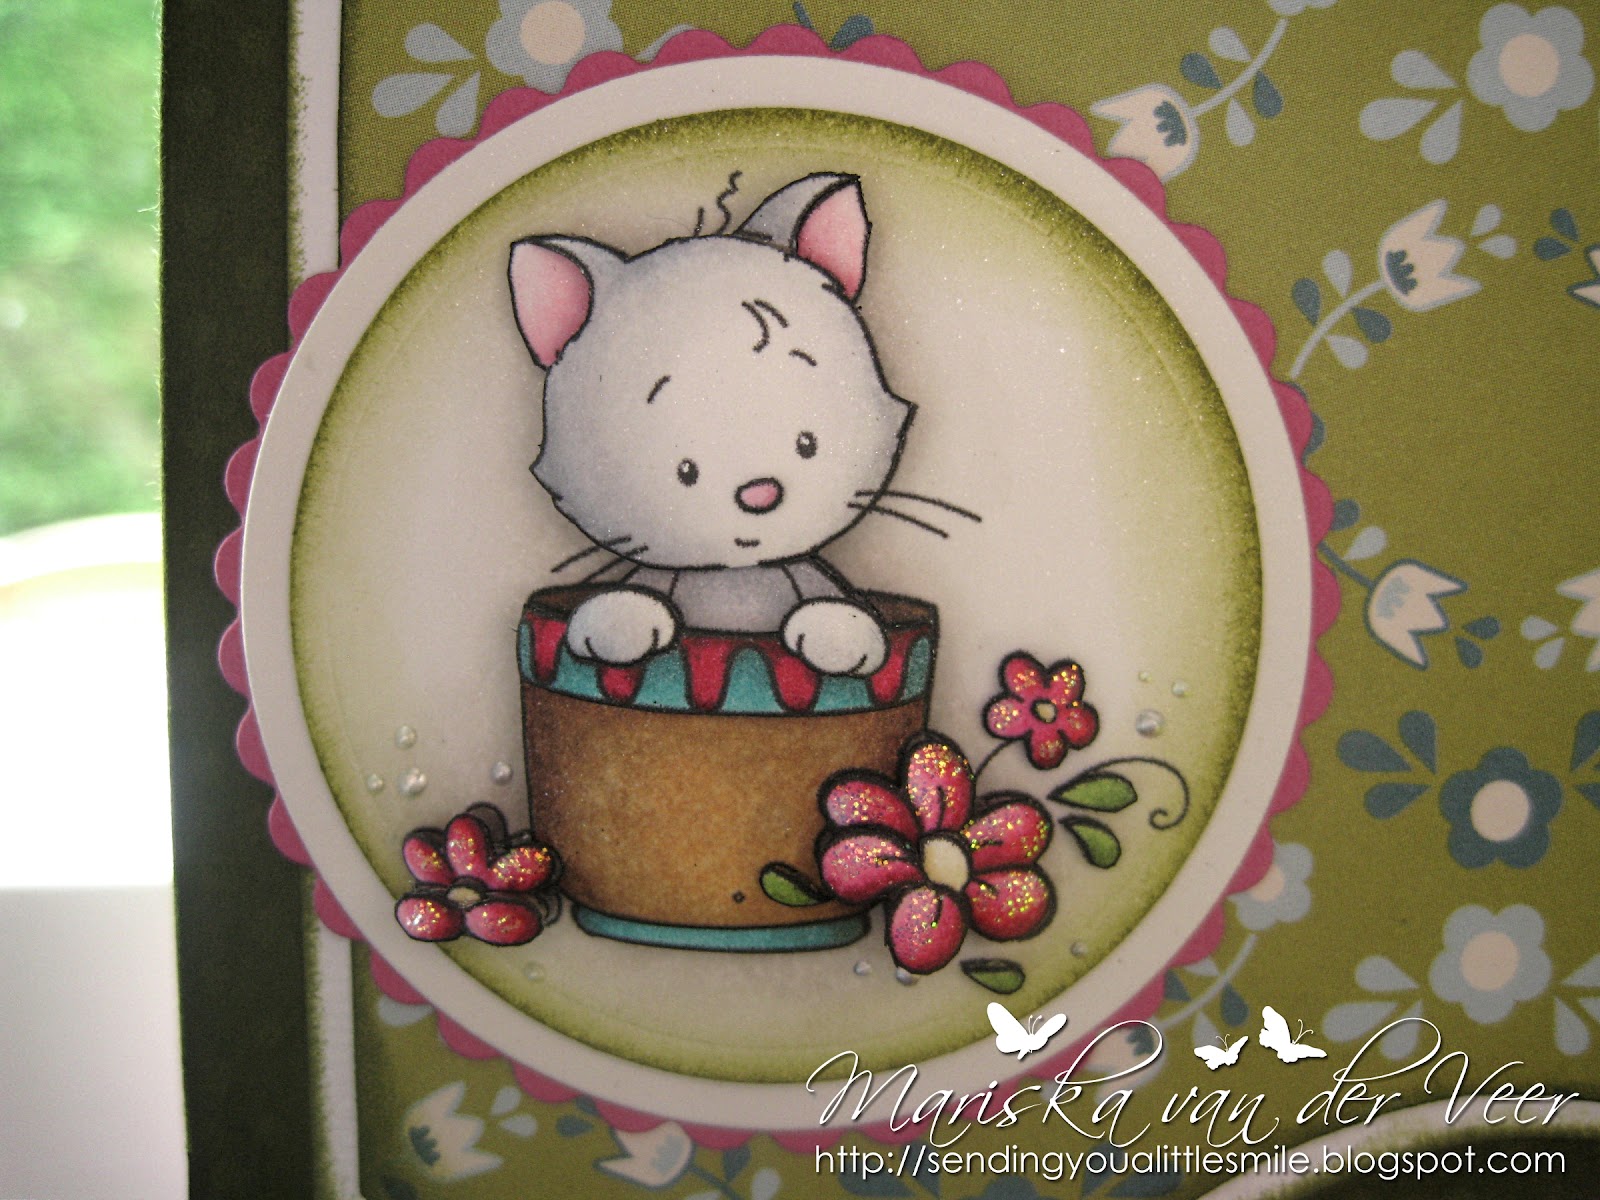
Posts tonen met het label My Time Made Easy. Alle posts tonen

woensdag 15 oktober 2014

A box of Flower Bulbs for my mum

Hi everybody

Today I'd like to show you a little project that I made for my mum. It's a sort of a milk carton with a holder filled with flower bulbs. When my mum came to visit us in the spring she noticed these gorgeous bluebells hyacinth flowers that I had in my garden and she said she loved them and asked me what they were. When I ordered plants for my garden the other day I decided to order her a bunch of the flower bulbs for these hyacinths so she could plant them in her own garden to enjoy next year.
One of the first design teams that I was on a looooooong time ago was Pink Cat Studio by Melissa Rodger. Though I haven't used her images for a while I still adore them and I knew right away that I wanted to use Pink Cat Studio's Lady Gnome for this project. What better image to decorate a box of flower bulbs then a cute little gnome right?
A close up of the adorable little Lady Gnome colored with Copic Markers and 3D paper pieced.
Here you can see the milk carton separate from the holder. I used a purchased template to create this set, the Well Contained template from My Time Made Easy (LOVE this template). As you can see I attached some of the gorgeous Wild Orchid Crafts flowers to the holder and some to the carton.
When the carton is put back in the holder they form a gorgeous flower corner together.
And the little pieces the Lady Gnome was made with.

Hope you like my little milk carton filled with flower bulbs. Can't wait to give it to my mum! Have a fabulous day everybody!!!

Hugs,


Materials used:
Image: Lady Gnome by Pink Cat Studio
Papers: Kraft and green cardstock and Carta Bella Antique Tile Paper design paper
Template: Well Contained by My Time Made Easy
Other: Clear Crystal Zva Small Flourishes (one of them cut into pieces) and Heart Shaped Sparkly Button both from The Ribbon Girl.
Wild Orchid Crafts products used:
Vintage Seam Binding Ribbon Moss Green
Mixed Green Open Roses 25mm
Mixed Green Open Roses 15mm
Purple/White Cosmos Daisy Flowers
Mixed Purple/Lilac & White Sweetheart Blossoms
Lilac Open Roses 20mm
Raspberry Divine Bakers Twine

vrijdag 8 augustus 2014

Willow the Birthday Fairy Slipcover box

Hi Everybody,

You may remember that I did a couple of Slip Cover boxes by My Time Made Easy before. This template is really simple to make and I love how you can decorate these boxes. Since each year I have some last minute teacher gifts to make (and I hate last minute work) I decided that this year I'm going to create about one gift up front so that when the time comes that I need them I have some at hand (or I could use them as a small gift when we go visit people or something like that). This is my first for this year and I hope you like it.
The image that I used is one of the newly released images by Tiddly Inks, Willow the Birthday Fairy.
A close up of Willow, colored with Copic Markers and 3D paper pieced as always.
And the gorgeous embellishments, all from Wild Orchid Crafts. I adore the big trellis roses.
This is the box opened up. You'll find more versions that I made of this box, also with filling HERE.
And the little pieces this image was made of.

The Copic Markers that I used are:
Skin: E11, E00, E000, E0000
Hair: E55, E53, E51, E50
Wings and boots: E84, E81, W0, W00, CB (and Diamond Stickles on the wings)
Gift wrapping paper: E42, E41, E40, W0, W00, CB
Ribbon around gift: E84, E81, W0, W00, CB (and after that layer dried) YR23, YR21, YR20, YR00 (and Diamond Stickles)
Pink: R89 (only to darken the R85 marker so not directly on paper but I went with the brush side of the R85 marker over the wide nib of the R89 marker to pick up some of the color and then colored onto the paper), R85, R83, R81 (and only on the dress after the first layer dried) W3, W1, W00
Shading: W5, W3, W1, W0, W00 (I also distressed the back with Frayed Burlap distress ink).

I hope you like the box! Have a great day everybody!!

Hugs,


Materials used:
Image: Willow the Birthday Fairy by Tiddly Inks
Paper: Kraft, white and pink colored cardstock and Glitz 6" paper pack Pretty in Pink
Dies: all Nestabilities
Box: Slip Cover Box by My Time Made Easy
Other: Button and twine from stash, Diamond Stickles, White Liquid Pearls and Diamond Ice Stickles (around the edges of the paper), Antique Golden Pearls from Flourishes with a Bling, stitches by hand and frantage.
From Wild Orchid Crafts:
Ivory Crown Pin
Baby Pink Crown Pin
Deep Ivory Open Roses 25mm
Ivory Open Roses 20mm
Pink Trellis Roses 35mm
Pink Open Roses 25mm
Mixed Pink Carnation Flowers
Pink/White Cosmos Daisy Flowers
Pink Sweetheart Blossoms
Baby Pink Sweetheart Blossoms
White Sweetheart Blossoms
Antique Gold Vintage Seam Binding
The leaves that I have used are from a mixed set that's not in the store at the moment. You'll find more leaves HERE

maandag 15 juli 2013

New challenge at Wild Orchid Challenges with Tweetest Friends by Little Cottage Cuties

Hi everybody!!

Today is the start of a new challenge at Wild Orchid Challenges and what we want you to do is use blue and/or purple tones on your projects. I needed one more teacher gift so I decided to make another Slip Cover box as these are super quick to make and decorate it with Tweetest Friends by Little Cottage Cuties from Whimsy Stamps. This means I'll have two of these boxes to give to the teachers, the other one being THIS one with the Flower Fairies I did earlier.
The image was actually pretty challenging to 3D paper piece but I do like how it turned out. The pretty design paper I used is by Maja Design and it's from the Vintage Spring Basics line. I used purple and white cardstock and I embossed the white decorative layer with a Birds and Swirls Cuttlebug Embossing Folder. The pretty decorative die-cut behind the image is of course cut with the largest Spellbinders Floral Oval Nestabilities. The absolutely gorgeous ribbon is Mermaid Pale Lavender 15mm ribbon from The Ribbon Girl. I absolutely LOVE this ribbon and need to get me more colors. The Wild Orchid Crafts products I've used are:
A close up of the pretty image.  As always colored with Copic Markers (sorry... forgot to take down the colors again :( and 3D paper pieced. I decided not to paper piece the little flowers.
And the little pieces the image was made of.

Hope you like my project and will get inspired to join us at Wild Orchid Challenges. Have a great day everybody!!!

Hugs,

woensdag 12 juni 2013

Teacher gift with Naughty Puppie

Hi everybody,

Today I have one of the projects to show you that I created with one of the images I colored up and paper pieced while making my video-tutorial for Splitcoast Stampers. Speaking of which, thank you SO much for all the lovely comments I received on that tutorial. Both I and Denise Lynn from Whimsy Stamps received a lot of questions about the Olba Glue and syringes after this tutorial. You'll be happy to know that there are plenty of syringes and glue tubes back in stock at Whimsy Stamps, you can find those HERE.

Anyway... like I said, I created a project with one of the Naughty Puppies that I colored up while making the video tutorial. Since I have four of these puppies because I had so many images pre-colored to do the tutorial I decided to turn them into teacher gifts and this is the first one:
Isn't he the most adorable puppy, Sylvia did such an amazing job on all four of these! As you probably know by now the puppies are both available as digital images and as rubber stamps. I made the box using the "Just a gift" template from My Time Made Easy, I love the shape of this box with the rounded corners. The design paper used is from a Basic Grey Max & Whiskers 6x6 paper pad that I got from my bestest buddy in the whole wide world Diana the rest of the paper used is kraft and green cardstock. The little flowers on the bottom are from a very old stash. I never thought I'd ever use these but couldn't throw them out and now I'm glad I kept them LOL. The pretty shape behind the image was cut with a die set that I bought second hand through a group on Facebook, it's the Doily Flower Multiframes from Nelly Snellen. I did some stitching by hand and added some frantage. And finally added a pretty red ribbon, some twine and a cute little bone charm that I also bought through a group on Facebook.
 The side of the box :).
And the back with the sentiment that's also in the Naughty Puppies set and this is the smaller die that is also in the Nelly Snellen die set.
And a clos eup of the cute little puppy with that adorable little charm :).

I hope you enjoyed my little box today and get inspired to create some cuteness of your own. Have a great day everybody!!

Hugs,

maandag 6 mei 2013

Wild Orchid Crafts Challenge 76 - 3 or more different types of flowers with Flower Fairy

Hi everybody,

Maybe you have already seen it yesterday on the Wild Orchid Crafts blog, I am extremely proud to announce that I am the new member of their design team. I absolutely LOVE their flowers and their ribbon and, while I am extremely happy with the teams I am on at the moment and really didn't want any more teams to add to the list, this was the only team that was still on my wishlist but I was absolutely sure it would stay a dream. Bev Rochester however made my year by asking me if I wanted to join and this was one team I didn't have to think about for a second :). So a HUGE thank you to Wild Orchid Crafts and especially to Bev Rochester for having me!

Today is the start of a new challenge over at the Wild Orchid Crafts Challenge blog and the challenge is "3 or more different types of flowers". Since the WOC flower selection holds a wide range of different flowers not that difficult. This is the project I created as a sample for this new challenge:
The adorable fairy is one of the Flower Fairies by Wee Stamps (available as digital images HERE and as rubber stamps HERE). This isn't a card but a Slip Cover box. You may remember I made two of these before HERE. The template is by My Time Made Easy and I think these boxes are perfect for little gifts.

The Wild Orchid Crafts products I used are:
Ivory Open Roses 20mm
Mixed Purple/Lilac Tone Trellis Roses 35mm
Purple/Lilac Tone Mulberry Paper Cherry Blossom Flowers
White Sweetheart Blossom Flowers
Lilac Sweetheart Blossom Flowers
12mm Gold Satin Ribbon


The gorgeous designpaper I used is Maja Designs Vintage Spring. I have distressed with Tea Dye distress ink and I have embossed some swirls with golden embossing powder.
This is the box open. I'm not sure what I'm going to put in there yet or who I'm going to give this to but it's always handy to have some of these gift wraps around.
And a close up of the fairy. As always colored with my Copic Markers and completely 3D paper pieced.
And the little pieces :).

I hope you enjoyed my little box and will give the new Wild Orchid Crafts Challenge a try. See you back soon!!

Hugs,


dinsdag 11 september 2012

Teachers gifts with Amy's Kitty

Hey everybody,
 
Back again with two teachers gifts I made. Leon has started peuterspeelzaal (a playgroup for toddlers) three weeks ago and this week it's already "dag van de leidsters" (day of the teachers) on this playgroup so naturally I had to come up with some gifts :). I decided to use another one of My Time Made Easy's templates, the Slip Cover. I used some very pretty paper I have been saving up and used an adorable little image by Sylvia Zet that you receive as a gift when you purchase the digi version of Amy, it is a secret gift though so shhhhhhh, don't tell anybody I told you :). The digi is actually a little different, I removed a few things and flipped it. This is one of the two boxes I made (there are two teachers).
Isn't it pretty? And don't you just love the little kitty? The hot pink ribbon is from Wild Orchid Crafts, I made a tripple loop bow with my bow easy. The hot pink pearls are from stash.
Here you see the two finished boxes together, I decided to do them exactly the same.
And for the curious people amongst you, I filled the box with chocolates and instant cappuccino, hope they like them :).
And here you have a close up of the little kitty. I used Peeled Paint distress ink around the edges of most papers.
And the little pieces of both little kitties :).

Hope you like!! This week is somewhat exciting first I got a lovely request by somebody who I really admire and yesterday I found out I made the top five on the Fashionista Challenge blog with my Summer Fairy card :). I don't enter that much challenges but I love challenges that have actual voting. Voting is still going on so if you want to see the top five and give your vote to your favorite be sure to do so HERE. They are also giving away a prize to one of the voters when you leave a comment after voting, love that idea as well.

Well be back real soon!!

Hugs,

donderdag 23 augustus 2012

Whimsy Stamps release hop day two with Anime Soccer

Hello and welcome to Day 2 of our June Rubber stamp; Die Release Showcase!
 
On Wednesday (22 August) Whimsy Stamps released this month's new rubber designs, new Shapeology dies, new digital papers and new Shape EZ by TLC. From then until 28 August the Whimsy Stamps DT and Special Guests are showcasing these fabulous new goodies with a daily mini blog hop and I am part of today’s hop!
 
Each mini blog hop has a new release prize hidden somewhere along the way and you have 24hrs to enter each prize draw. To be entered into today's mini blog hop prize draw, be sure to leave a comment on ALL of the DT's posts listed below by 12.00PM EST tomorrow. All winners will be announced on the Whimsy blog on 29 August.
 
I decided to ink up one of Kenny K's new stamps, Anime Soccer. I have a little neighbour boy that this image is just perfect for so I decided to make him something to put his present for his sixth birthday in. I used another one of the My Time Made Easy templates (no not working for them or being sponsored, just love to use these), this time I used Boxed Lunch. Remember I did a small toturial on how to use these templates without a cutting machine HERE.
I tried to make it as cool as possible and I colored the little guy in the colors of the Alkemadia soccer team where I know he has been to, not sure if he's on a team there now though, didn't want to ask because I didn't want to spoil the surprise :). The papers I used are from a paper pad by Bo Bunny named Liberty. The large six is from K&Company, these letters are called glittered Twinkle Type and I've had them a LONG time, don't think they will be available anymore. I have added some silver stickles and some button with twine.
A close up of the stamped, Copic colored and 3D paper pieced image.
And a side view of the box. Some parts of the box have been decorated with Inkssentials Foil Tape Sheets again, I treated them the same way I did on THIS card, I only used a different embossing folder.
A top view, I love how this lunch box turned out.
Don't know why I took this one but it does show the foil sheets well and the dimension to the image. So just thought I'd share :).
And finally the little pieces. That's it for my project for today, to take a peek at the fabulous new release creations that the other girls on todays hop created, please click on the links below:
Remember that the entire new release is available to buy right now from the Whimsy Stamps store along with all your Whimsy favourites. Thanks for stopping by and don't forget to pop back to the Whimsy blog tomorrow for more new release creations!
 
Hugs,


woensdag 15 augustus 2012

Grammy's Sewing Kit with Lovey Dovey Amilia by TGF with tutorial(s)

Voor mijn Nederlandse lezers, ik heb de tutorial voor het gebruik van My Time Made Easy templates ook in het Nederlands geschreven.

Hi everybody!!

If you have received todays newsletter by The Greeting Farm you will have already seen my next project. In this newsletter there is a tutorial from me on how I 3D paper piece my images. If you haven't signed up to the TGF newsletters yet you can do so on the home page of the store: HERE. The image I used for the tutorial is Amelia from Oliver and Amelia's Lovey Dovey set. Here is the project I created with it:

Isn't it adorable? It's the latest template released from My time made easy, Grammy's sewing kit. When I saw samples of this new template on Lauren Meader's blog I knew I had to have this one. Here is kit with the top opened:
The top boxes can also be opened. You could give some bonbons in the bottom with some teabags in the topboxes, or candles in the bottom and matches on top. Or you can fill it with ribbon and buttons for a friend who also likes to craft. The ideas are endless.
This is a close up, a close up of the image can be found in the The Greeting Farm newsletter, just as pictures of the creating of the image and the little pieces it was created from.
And finally the other side of the kit.

Now I have used a different template by My Time Made Easy before. You can find those HERE. I also used a template by Lauren Meader for Papertrey Ink, you can find that one HERE. Now you may think that you need a cutting machine for these templates, but I don't have one and you really don't need one. I thought I would just show you how these templates work when you, like me don't have a cutting machine. You want to buy the template that you want to purchase as a PDF file. I'm sure most of you are familiar with PDF files, you can download Adobat Reader, the program you need to use the PDF files for free HERE. I'm also translating this tutorial in Dutch so the next bold and italic piece is just that :).

Ik hoop dat jullie de naaikit leuk vinden. Ik heb al eerder een template van My Time Made Easy gebruikt en van PaperTrey Ink waar Lauren Meader eerder templates voor maakte, door op de eerste twee links HERE hierboven te klikken kun je die voorbeelden zien. Nu denken sommige mensen dat je een snijmachine nodig hebt om deze templates te gebruiken maar ik heb dus ook geen snijmachine, en dat is dus ook niet echt nodig. Het leek mij wel handig om aan de mensen die deze templates nog wat eng vinden te laten zien hoe je ermee kunt werken. Allereerst, als je dus geen snijmachine hebt zul je de bestanden moeten kopen als PDF bestanden. Bij sommige template-verkopers krijg je alle formaten in je aankoop, bij My Time Made Easy kies je specifiek voor PDF. PDF bestanden kun je lezen met Adobat Reader, een gratis programma dat je HIER kan downloaden, maar de meeste mensen zullen het al wel kennen en op hun computer hebben staan.
After your purchase you can download a ZIP file from the My Time Made Easy website. I'm sure most of you have downloaded and extracted ZIP files before, if you haven't you can read THIS tutorial. Your ZIP file will have several PDF files that together will make the project you want to make. All the files are made to print on letter-size paper or cardstock, the size of letter-sized paper is 8.5 x 11 inch or 21,6 x 27,9 cm. If you use 12x12 inch sheets of paper you need to simply trim the paper to that size. In the printer settings you will want to set the printable paper size to "letter" and when I cut on thicker paper I set my printer settings to photo paper. You want to make sure that the page layout is set to normal-size printing. On the picture above this text you will see the printed sheets of paper, one already partially cut out. As you can see there are lines without interruptions that you need to cut, dotted lines that you need to score and there are also dots where you want to punch holes. There are base parts that create the project but Lauren also provides you with parts to decorate the project. How I use those I'll show later on.

Nadat je je aankoop hebt gedaan kun je een ZIP bestand downloaden van de My Time Made Easy website. De meeste van jullie zullen wel eens met ZIP bestanden hebben gewerkt en anders kun je HIER lezen hoe je ermee moet werken. Het ZIP bestand bevat enkele PDF documenten die tezamen het project vormen dat je wilt maken. De bestanden zijn gemaakt om te printen op letter-formaat papier. Dit is de Amerikaanse standaard in plaats van ons A4-tje. Het letter formaat is 21,6 x 27,9 cm. groot, of 8,5 x 11 inches. Als je 12x12 inch papier gebruikt, het formaat van Bazzill cardstock bijvoorbeeld, dat snijd je dit dus gewoon in dat formaat. Je moet je printerinstellingen wijzigen naar letterformaat en ik kies fotopapier als papiersoort als ik met dikker papier werk. Je wilt er ook voor zorgen dat je printer in het juiste formaat afdrukt, dus geen aangepast aan het papier of in een bepaalde verhouding maar het normale bestandformaat. Op de foto hierboven zie je enkele van de afgedrukte delen, een deels al uitgeknipt. Zoals je ziet zijn er lijnen zonder onderbrekingen, die geknipt moeten worden, gestippelde lijnen die gevouwen moeten worden en de gaatjes moeten uitgeprikt of gepunched worden. Er zijn basisdelen waarmee het project wordt gemaakt maar Lauren Meader geeft ook delen die je uit kan printen voor decoratie. Hoe ik met die delen werk laat ik verderop zien.

One of the PDF files is a complete manual on how to put the project together with a sample. I use the printed side of the template on the inside of the project, this way you don't see the dotted lines.

Een van de PDF bestanden is een volledige handleiding (in het Engels maar wel met hele duidelijke foto's) hoe je je project in elkaar moet zetten. Ik gebruikt de geprinte kant altijd aan de binnenkant van mijn project zodat je de gestippelde lijnen niet ziet.
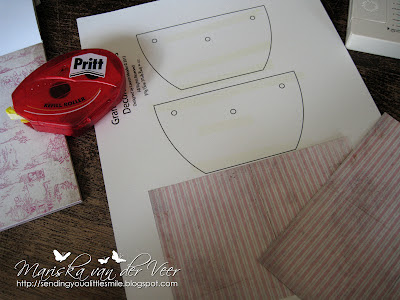
Then a little tip. I use a lot of 6x6 inch patterned paper kits, which are of course impossible to cut into a letter size. What I do for the decorating parts of the projects (and also on some of the smaller base parts of the projects) is I print it on white letter sized paper (I used my Paper Temptress paper that I use to Copic Color my images with but you can also just cut cardstock to the letter size). Next I take a non permanent adhesive (mine is a roller by Pritt) and attach (cut parts of) the patterned paper I want to use on top of the printed templates, making sure the patterned paper covers the whole part (see picture above). I feed the paper again to the printer in the same direction as I did the first time and print again, the printer will now print on the patterned paper. Then you simple remove the patterned paper from the base template and cut as normal. I remove the non-permanent adhesive from the base document by simply rubbing it off and keep that for the next time I want to use the template.

Dan nog een kleine tip. Ik werk veel met 6x6 inch patterned paper blokjes, die natuurlijk niet te snijden zijn in een letter formaat. Wat ik doe voor de decoratieve delen van het project (en ook voor kleineren basis delen zoals in dit geval de roze "scharnieren" en het handvat) is het bestand printen op wit letter formaat iets dikker papier. Ik gebruik het papier waar ik ook op kleur van Paper Temptress dat ik koop in letter formaat maar je kan natuurlijk ook wit cardstock in letter formaat snijden. Vervolgens breng ik op de te printen delen niet permanente lijm aan, ik gebruik een roller van Pritt. Dan breng ik (op maat geknipt) design papier aan over de te printen en van lijm voorziene delen (zie de foto). Vervolgens voer ik het papier weer in de printer in op dezelfde wijze als ik het de eerste keer heb geprint en print opnieuw. Nu print mijn printer op het design papier. Tot slot pel je de design papier stukken van het basis vel, en gebruikt de delen zoals je ze normaal zou verwerken. De lijmresten kan ik simpelweg wegwrijven van het basisvel waarna ik het basisvel bewaar voor een volgende keer dat ik de template wil gebruiken.

I hope you found this small tutorial helpfull and that it will take the fear of using templates when not owning a cutting machine away by some people. These templates are super easy to work with and the results are so cute! If you have any more questions please let me know!!

Ik hoop dat jullie deze tutorial nuttig vonden en dat het bij een aantal mensen de angst van het gebruik van templates als je geen snijmachine hebt weg zal halen. Deze templates zijn zo makkelijk om te maken en ze zijn zo leuk!! Als er nog vragen zijn stel ze alsjeblieft!!

Hugs, Groetjes,

woensdag 20 juni 2012

Copic Marker Europe, Whimsy Stamps and The Greeting Farm....

Hey people!!

Sorry to have been quiet for so long. I am slowly starting up the crafting thing again though :). I'll have a card on my blog for All That Scraps later today but in the meantime, I have some news for you guys.

Copic Marker Europe
As you know I'm very proud to be part of Copic Marker Europe's design team. This month CME is celebrating it's 1st birthday and who gets the presents.... YOU!!! After reading my post (because there's more news to come) you should really bring a visit to the CME blog. There are fabulous freebies by Sylvia Zet of Wee Stamps and by Saturated Canary if you take part in the contest and there is a hop (which unfortuntally I won't be joining) with prizes along the way. So after you finish reading this post you want to go to the Copic Marker Europe blog!


Whimsy Stamps
And there is another hop later today. Whimsy Stamps is releasing it's June stamps today so starting today there are bloghops until the 26th of June. Again I won't be attending, I took a month off but I HAVE seen the stamps (and couldn't help myself HAD to buy a couple of them) and believe me... you don't want to miss this release or the hops. The hops start today at 12 PM EST (dat is 6 uur vanmiddag Nederlandse tijd, and 5 o clock this afternoon in GB). As always there will be prizes along the way so you want to check out the Whimsy Stamps blog this afternoon at 12 PM EST. Oh this is one of the stamps that'll be released today... this is an oldie but isn't this cutie from Meljen's cute!!!


The Greeting Farm
You may have seen already but Jessica Diedrich, the Creative Coordinator at The Greeting Farm, asked me to be a special reporter for the TGF newsletter. I have been a big fan of TGF for forever and so it didn't take me very long to say YES YES YES :). The first TGF newsletter with me in it came out earlier this week and just in case you aren't signed up for it (you really should sign up for it though) the link to it can be found HERE. For this issue I have done a project with the cute Cheeky Geeky, in upcoming issues I may surprise you with tutorials and more projects :). I'll leave you with a close up of Cheeky Geeky, for the complete project you need to visit the newsletter :).


Well... that's it for this morning. I'll be back with an all new All That Scraps project later today so hope to see you back then!!!!

Hugs,